Installation and Removal Instructions for Floor Anchor Pots
#1600 Floor Anchor Pot Installation and Removal Instructions
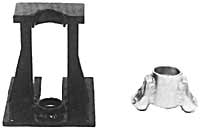
Floor Anchor Parts Identification: Anchor Press Stand
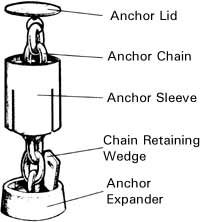
These instructions are for floor anchors with removable chain feature. Such anchors typically include T-slotted anchor expander and chain retaining wedge.
Required Tools: Anchor Puller Claw
Additional Tools Required:
- - 10 Ton, 6 inch Stroke Ram (With Threaded Ends)
- - 10 Ton Hydraulic Air Pump
- - Vacuum Base Core Drill (Wet System)
- - 3 1/2" Diamond Bit (.020" to .025" oversize)
- - Puller Tube
- - Miscellaneous hand tools
Instant-Installation Of Anchors For New Floors
1. With butt-end of 4 lb. sledge hammer, pound out anchor expander wedge from assembly.
2. Lay anchor on it's side on a hard surface and strike a hammer blow on each of the four sections of the slotted end of the anchor sleeve to reduce diameter of the sleeve just enough so that the floor plate slides over the sleeve easily.
3. Install floor plate over slotted end of sleeve until it is about 1/3 on the anchor or about ½ to ¾ in. of slot remains above floor plate.
4. Replace anchor expander wedge back onto sleeve and strike several hammer blows until wedge is secured onto anchor. About ¼ in. of wedge base will protrude from bottom of sleeve.
5. Install chain and retainer wedge with one link below expander base.
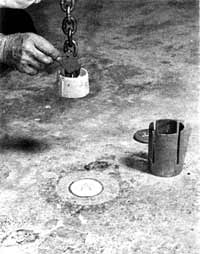
6. Using ordinary newspaper and masking tape, wad on full size sheet outside base of anchor and one inside anchor. Tape another wad fully onto the base so concrete will not entrap chain underneath anchor after it has cured. This measure will ensure that the chain will be removable.
7. Fully tape all slots so concrete will not seep into anchor during pouring operation. The wad of newspaper inside anchor is added insurance against seepage of mix into anchor interior. Turn lid upside down so logo is facing inward and tape lid securely onto anchor. Anchor is now ready to be set into place.
8. Lay out desired stall pattern. Using string to find concrete level, locate each anchor and begin pouring operation. If time allows, it is best to "set" each anchor with a batch of concrete first. When the set anchors have hardened into place, complete the slab finishing the surface level with all anchors. Allow 4 weeks to cure before making a pull. Newspaper wad under anchor will rot away leaving access for chain removal.
Assembling Floor Anchor |
|
|
1. Anchor expander has T-slot on bottom. Chain can be adjusted one link at a time by turning 1/4 turn. |
|
 3. Insert chain retaining wedge and press firmly into slot. DO NOT ATTEMPT TO PRESS WITHOUT RETAINING WEDGE! |
 4. Grasp anchor sleeve and pre-assembled expander and chain. |
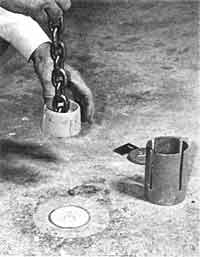
 5. Firmly insert anchor expander with chain into anchor sleeve. |
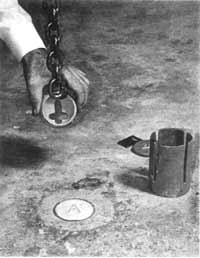
 6. Hold assembly by wire ring making sure anchor expander is evenly aligned to sleeve. |
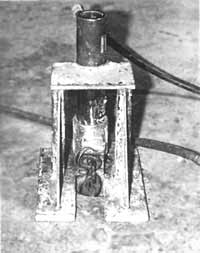
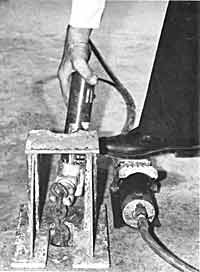
Installing Anchor with Ram and Anchor Press |
|
|
|
 2. With ram fully retracted apply pressure to foot pedal to begin pressing anchor into floor. |
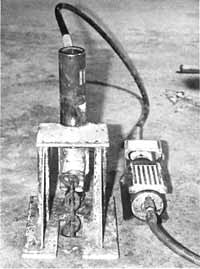 3. Continue pressing anchor to full capacity of pump. With fluid gauge attached, pressure should reach maximum of 10,000 PSI. |
 4. Retract ram and remove anchor press and puller claw assembly. |
Adjust, Remove, or Replace Anchor Chain |
|
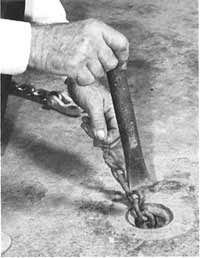
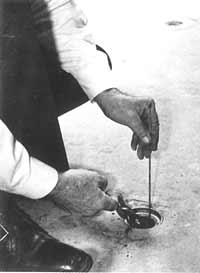
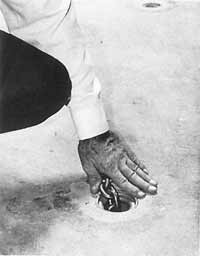 1. Use air hose to remove debris from hollow area of anchor sleeve. Pull chain to side to expose retaining wedge. |
|
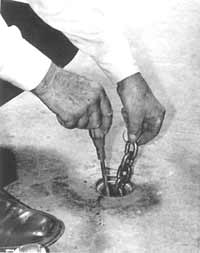
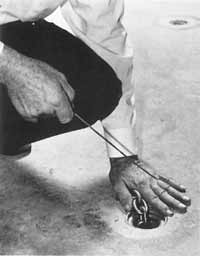 3. Use a length of welding rod with hooked end (or similar tool) as a means to hook into retaining wedge slot. |
 4. Insert hooked end into slot at top of chain retaining wedge. |
 5. Pull chain retaining wedge completely out of T-slot on anchor expander and remove from floor anchor. |
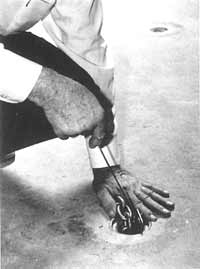
 6. Work chain loose from anchor expander and adjust to desired height. Replace retaining wedge when finished. |
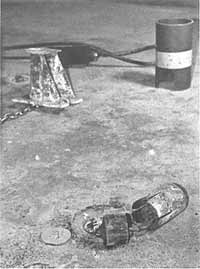
Removing Floor Anchors |
|
|
|
 2. Position driver on edge of anchor expander on the opposite side of the chain retaining wedge. |
 3. Striking a firm hammer blow, dislodge anchor expander from anchor sleeve. Take care not to damage retaining wedge. |
 4. With anchor expander dislodged from anchor sleeve, attach puller claw to protective ring at top of sleeve. |
Removing Floor Anchors - Using Remover Tube |
|
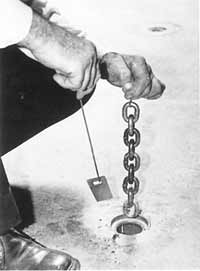
 1. Position remover tube over anchor as shown with puller claw and chain. |
 2. Position anchor press over puller tube as shown with chain protruding from opening. |
 3. Install ram and puller claw assembly into press if not already prepared. |
 4. Attach chain to puller claw removing all the slack. |
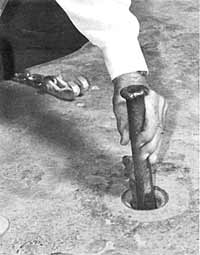
 5. Slowly apply pressure to pump. Sleeve should easily rise from hole in floor. |
 6. Extend ram fully. Sleeve should be completely free of hole and will remove easily. |
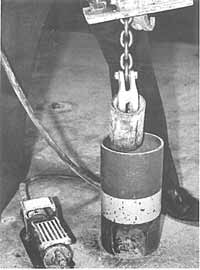 7. Pull anchor press and ram off puller tube with freed sleeve. Repeat if one extension of ram is not enough. |
 8. Removed anchor may be reinstalled. Strike even hammer blows on 4 sleeve tangs to restore sleeve for re-pressing. |